Friday, 15 April 2011

Easter Top Ten Day 2


Today's Easter project is a little something i was experimenting with for my little niece who is too young for chocolate treats this Easter.  For anyone who is following Scratchycat on Facebook you will have already seen this. Its a bunny in a bag!. i had no idea how scruff the bunny would turn out as i roughly sketched an outline on some cotton and then added bits as i went along. I have to say i love her and she looks miles better than i thought she would!.


i will try and do a pattern for her over the weekend and upload it for anyone who wants to use it..
topsy turvy tuesdays

Thursday, 14 April 2011

cute little keyrings

This week is Easter holidays so the chance of me getting much crafting done is pretty slim! Most of what i do will probably involve Lili's artistic talents!! Mr G would probably say most of my projects look like that anyway but hey ho!.

To get me motivated with all the Easter gifts i have to make i thought i would start a Easter top ten projects where i will post an Easter project everyday (ok don't shoot me if its not every day!!).  Ok what are we waiting for then lets start with an easy peasy project - Easter keyrings....

 These do become addictive to make . You have been warned!!

Ok want to make one?...

You will need:-
  •  a plastic type sticker or other embellishment. I used bubble stickers for this.
  • 2 pieces of felt bigger than your sticker or embellishment
  • scrap piece of ribbon
  • lobster clasp key fob
  • thread
  • fabric glue
  • wadding
  • scissors
  1. take your 2 pieces of felt and lay them flat on top of each other.  Place your sticker or embellishment in the centre of one piece.
  2. sew around the edge of the sticker/embellishment leaving a space at the top for ribbon and stuffing.
  3. cut around the edge close (but not too close) to the stitches.
  4. gently stuff the shape through the hole
  5. Loop your ribbon through the hoop of the keyring and then place the 2 ends of the ribbon inside the hole at the top of the felt shape.
  6. stitch over the gap closing up the shape making sure the ribbon is firmly in place.
  7. peel the sticker off slightly and apply some fabric glue to the underside then place back flat and let glue dry.


Tuesday, 12 April 2011

Scratchycat hits facebook

Scratchy cat crafts
After months of meaning to get a Scratchycat facebook page up and running i have finally done it!!... Its still working progress but go over and have a peek and let me know your thoughts. Oh and feel free to choose "like" if you want to be kept up to date and make me feel special :-).  i will be doing tutorial links to here on there and posting lots of ideas and crafts so i'd love you all to join me. If you want to follow me click on this link and then click on like on my page.  If you pop over now there is a sneak preview of some cute bunny keyrings i just made...

Monday, 11 April 2011

Felt Easter booty bags

Ok why is it that i get myself organised months in advance for things but then right at the last minute still seem to have loads to do!. I have been making experimental easter gifts and accessories for weeks now which given Easter is a couple of weeks off i thought was ok. Then it dawned on me whilst sat soaking up the sun yesterday that Lili's last day at school is tomorrow and that i had promised we could make to make her 20 little easter presents for her classmates. Uh oh panic stricken i grabbed my sewing machine and some fabric and ribbon scraps and set about making little bags big enough to hold mini eggs or mini cadbury bars. In the end they have worked out quite sweet..

 I used poundland stickers on the front and attached them with fabric glue to make sure they don't come off.


I thought that will i was at it i might as well make some extra so i have listed them in my folksy shop.

If anyone wants to make them you will need 2 pieces of felt 3" x 4.5" 2 pieces of scrap ribbon or cord and some stickers or embellishments for the front.

Take one of your felt pieces and along the short edge sew the ribbon on like a handle ( i did 2 rows of stitching for strength) and then repeat with the other piece of felt.

Take your 2 pieces of felt and place them with wrong sides together inside and sew around the 2 long sides and the bottom short side.  Then stick your embellishment on the front and that's it....

Friday, 8 April 2011

More wooden tags...

Well most of you will know by now that once i start a particular type of craft i tend to get a little obsessed!!This week i started making some Easter gift tags out of Wooden shapes and scrapbook papers. Now i can't stop!. Here's some more i made last night!!.

I have used paper flowers and brads to embellish them


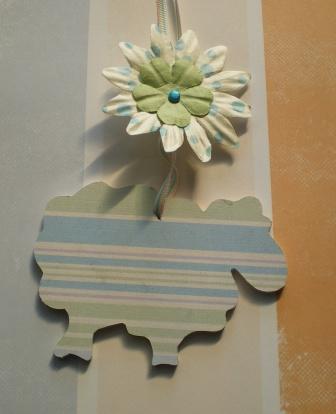
 How cute is the wooden sheep.  I bought the wooden shapes off ebay and you can get so many different shapes and characters the options are endless.
 I used a sparkly card butterfly to embellish this one.


This bright floral duck is covered using a scrap of scrapbook paper. It is just right for spring.
Iron Violet Designs