Showing posts with label printables. Show all posts

Wednesday, 20 April 2011

Free Easter printable


I just had to share with you all this last minute gift tag I have done to add to the Easter gifts lili is sending to cousins. I designed it using Picnik (I love that software!!). I might also print of the label and use it as a topper for some chocolate egg bags... If you want a copy to use for your own projects then just drop me an e-mail to scratchy.cat@hotmail.co.uk or you may be able to right click the image and save to your pc. If you do use it I'd love to see your projects so please link back.

Tuesday, 11 January 2011

Easy homemade desk calendar

2011 Mini Cal
Last week while blog hopping i came across creativemamma website which has some fab free printables on it. One of those was the gorgeous mini calendar sheets above.  Now i have lots of free calendars from Contractors at work but just because i'm an engineer doesn't mean i want to sit and look at drab engineering pics on my calendar everyday.  I decided to use the free printables and make this..

I will do a tutorial for it when i get a minute as its really easy to make using an A4 sheet of card some keyrings, the printables and then any embellishments you like.
While i am doing the tutorial have a sneeky peek at creativemamma for some fab printables.  Here are a few
of my favourites...
Kokeshi Doll Gift Tags  kawaii bird mini cards   robot book label  Doodle Calendar


I will be linking this post up with
lil luna button
Make it Yours @ My Backyard Eden

Thursday, 2 December 2010

Experimental makes!

This week i have been having doing a bit of messing about.  For some reason our study has been freezing (even with the heating on and lots of layers!) so i haven't spent much time in there so have only done a few tiny projects. Before i show you those however this is the wooden/fabric advent calendar i made for Lili.  It didn't take long to do.  I used a piece of MDF as the backing and then glued blue and green co-ordinating 12" x 12" card on.  then i cut out triangle's for the trees and rectangles for the stumps.  Decorated with papermania snowflake stickers and then cut out 24 pieces of different size rectangles out of felt.  I then stuck on felt numbers and used a hot glue gun to attach the wooden ho ho ho (which i bought from Home Bargains).


Now on to the experimental makes!I found some teeth  and lip sweet bags in tesco and thought i would do something funny with them.  Not sure why i have decided to give Santa False teeth but it does make me laugh!.
 I designed the header for these doggy treat bags using picnik.  i f anyone wants a copy drop me an e-mail to scratchy.cat@hotmail.co.uk.


 I made this little treat for Lili's teacher using the free printable from livinglocurto if you haven't visited this

website take a peek they have fantastic free printables 

 A few more stocking fillers that i great for girls!.  To make each set you will need one 12" x 12" scrapbook paper, one A6 notepad, 5 pencil crayons, embellishments and a cello bag.

Tuesday, 16 November 2010

More milkshakes!!

Just a quick post to show you a few more fairy milkshakes i have made.  See my previous post for what goes inside.

  Ok go on then i'll also show you the chocolate gift sets i made!!

Stocking fillers Part 3

Todays stocking filler is one i have made with my little girl in mind - because its covered in Pink. Anyone with a little girl will know if its not pink then its just not girly!! The idea was taken from a thread on MSE where someone (sorry but i can't remember who but if anyone is reading this and thinks it was them just leave me a comment and i'll edit it) mentioned they made princess shakes. i have recently made loads of snowman soup and thought this would be a nice alternative for young girls.

Heres how i made it.  I designed a label and thought up (ok my fab hubby came up) a suitable poem to put on it.  i used picnik to design the label.  Then i cut it out and stuck it on a sheet of papermania xmas backing card.  I repeated these steps so that i had one for the front and one for the back.  then i put all my ingredients together in a self seal bag.  i also used individual smaller bags inside for each of the items to make sure they stay fresh.  Then i took the sealed bag of goodies and attached it to the wrong side of one of the sheets using roller double sided glue tape.  Then i took the other sheet and attached that on top of the bag of goodies so they were sandwiched between the two sheets.
The contents i used are shown in the pic above:-
  • pink milkshake powder i used nestle but there are lots around.
  • mini marshmallows
  • pink candy sweets
  • chocolate biscuit striring sticks
If anyone wants a copy of my lable then drop me an e-mail to scratchy.cat@hotmail.co.uk and i'll send it you.

Saturday, 30 October 2010

Free Christmas templates

Yesterday i was making up some stocking fillers and decided to have a play around and design new snowman poop and rudolph noses headers for my packets. This is what i came up with....
  For anyone who wants to make there own i have added the labels i designed below.  Right click on the picture of the label and save picture to your computer.


I made the bags by sewing organza ribbon into a little pouch.

Thursday, 28 October 2010

how to make your own printables

Next week is Lili's birthday and she will be 5.  I have been looking for some cool cupcake toppers and hadn't found any that really stood out and then i came across a great tutorial on themotherhuddle blog which shows you how to make your own printables.  Heres my first attempt but i was just messing about. It is done using picnik.


I'm going to have a go at doing some Christmas labels when i get a minute. 

Staying with the theme of Lili's birthday i have been starting goodie bags for the party and have made these to put in the bags.  They are milkybars wrapped in background paper and i have made a label to stick on - wish i had found picnik when i made these!!!
These are halloween ones i have done as well!!
Last year i bought a green plastic wreath in the sale in Tesco.  I intended on buying christmas bits and jazzing it up for this year.  However i changed my mind and made it into a halloween wreath by spray painting it black and adding embellishments.  i glued them in place with my hot glue gun.


and finally i bought some cute owl stickers from accessorize and made these cards today


Sunday, 24 October 2010

Crafty Sunday with a halloween theme

This weeks crafty sunday makes are mainly halloween themed.  This is because i had a bit of a mad moment and thought it would be a good idea to have a halloween party next sunday for Lili and all her friends.  The invites have gone out and now i just have to get organised!!.  here is what i have made so far...

 I have made this halloween tin by recycling a chopped tomato tin and using a halloween backing paper.  All you do is cut the backing paper to the right size.  i cut mine to 10.5cm high and approx 25cm wide.  I then added a happy halloween round label that i printed off.  This website has lots of amazing free printables to start you off
I have made little trick or treat sweet bags

These will be the party bags to take home .  i just bought some brown paper bags from home bargains (89p for ten!) and then printed off the trick or treat paper and stuck on with roll on glue.

I have made this sign for on the buffet table

Another trick or treat sample.  I used a plastic test tube then printed off a label onto card and tied a piece of ribbon round the tube then secured the tag on with a brad.

 The wall hanging was from home bargains and i covered it with 3 kinds of backing paper and embellishments.  The boo paper is downloadable free from skip to my lou website.
Phew now i feel a little more organised!!!

Wednesday, 20 October 2010

I'm surfing again!!

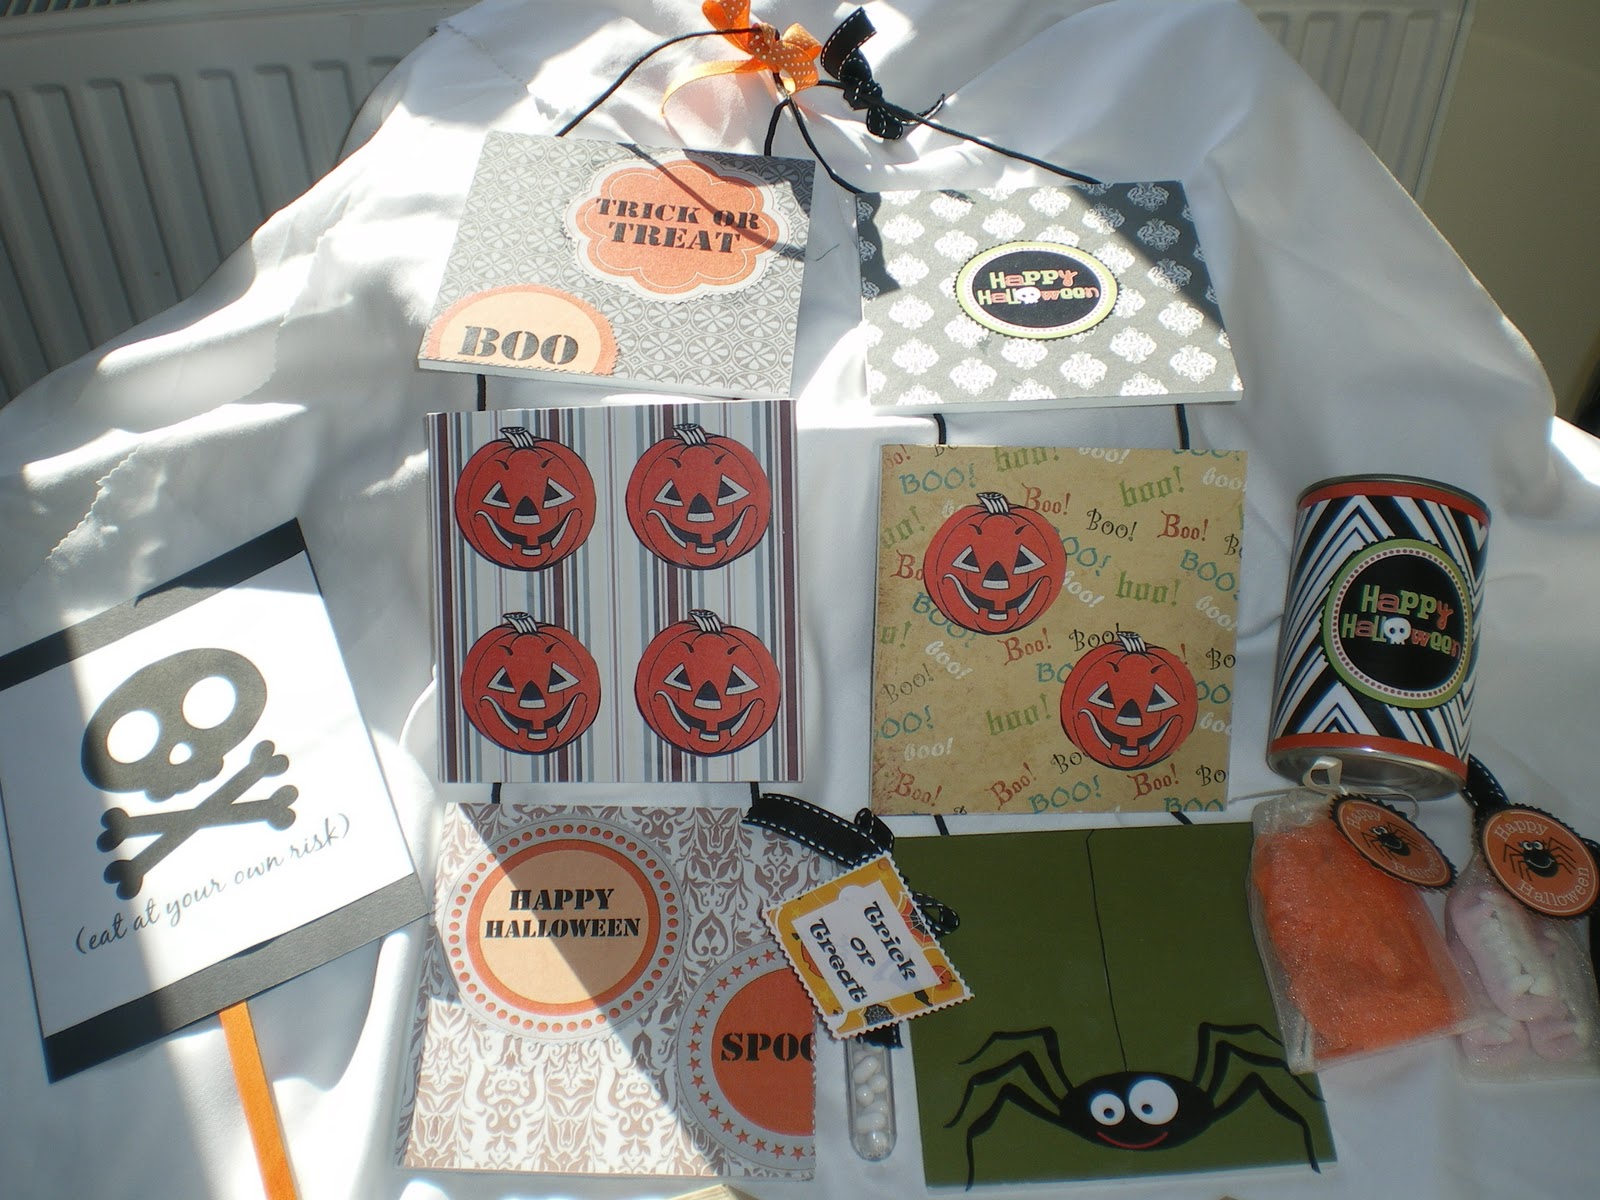
For the last five days i have been having internet connection problems.  It has been taking 5-10 minutes to load web pages and has been driving me bonkers!!!.  Fingers crossed it seems to have improved so lets hope it stays that way!.  So now i'm back in blogging world i can share my makes from this week.  Halloween is just around the corner and there are some fab papers and accessories around at the moment.  i used some cool free printables from various blogs to make this...


The backing papers are papermania.  Here are just a few blogs with some cool printables if anyone wants to use some.

You can spend hours going through the sites above getting some great ideas.  Anyway i will upload some more of this weeks makes when i get a few spare minutes tomorrow but now i'm off to bed.  Night all!!