Showing posts with label xmas. Show all posts

Wednesday, 16 November 2011

Christmas countdown weeks 3&4

Ok due to being absent for a couple of weeks i haven't had chance to do my weekly Countdown to Christmas so I'm doing two in one today!.  First up are Pots of Snow which is a revamp of something i did last year.  This idea came from the fab forum on Moneysavingexpert and is essential white bon bons in a jar with a little poem and embellishments.  Super easy, super fast and a great stocking filler that looks nicer than just a boring pack of sweets.  These 2 pots were for an order but i have some more empty jars so i might make some more up.
 The caption says " I'm dreaming of a white Christmas just like the ones we used to know but in case this doesn't happen here's a pot of snow.

This second project is again a revamp of one i did last year (again the idea came from the moneysavingexpert forum).  This poem really makes me chuckle and these make fab stocking fillers for friends.  All you need is a cookie cutter,some scrapbook paper and a cellophane bag.  You don't even have to use a bag you could just attach you poem to the cutter with some nice ribbon.

Wednesday, 19 October 2011

Christmas Countdown week 2


This weeks Christmas Countdown post is two easy peasy 5 minute projects that are great if you have little kiddo's. For the first one all you need is a plastic or old no longer needed key, some card or a wooden tag and some stickers and glitter. Put them together and you have a magic key to leave out for Santa on Christmas Eve. 


There are lots of thrift/ discount stores that sell Christmas Santa keys though most of the ones i have found look cheap and a bit ghastly.  You could use one of those and just pimp it up a bit with extra glitter and a tag to make it look nicer.  I found my plastic key on eBay then just added glue and glitter and painted a wooden tag and used a gel pen to write on it. 

The second project is reindeer food which is basically oats with added edible glitter added for a bit of sparkle.  Now please make sure you use edible glitter in any you make to ensure its save for wildlife that may eat the oats you sprinkle.  There are lots of different ways of storing your reindeer food. Some people use sealed bags, some use drawstring bags and i have used round cardboard boxes painted before embellishing.   

Now i can't say much more yet but very soon i will be holding a fabulous giveaway so keep your eyes peeled early next week to get your hands on an amazing prize.....

Monday, 10 October 2011

Christmas Countdown Week 1

Well it is just under 11 weeks till Christmas so I thought I had better start getting organised!. I have about three quarters of my Christmas Shopping done so far so I’m fairly organised on that front but need to get started on all my handmade gifts. I made myself a rule last year that everyone would receive at least one handmade gift from me even if all their presents aren’t handmade. The problem I have this year is that with constantly making things for my unit at Botany Bay, Craft Fairs, a shop in Devon that stocks my items and orders through my folksy shop and work I don’t get much spare time to do any other crafting at the moment . I think I am going to have to draft a plan. Now being the lady of lists this bit will be easy – actually doing what’s on the plan may be more difficult!!. Anyway I am going to give it a whirl and I will post my plan on here next week to try and motivate myself!. I also thought to try an motivate everyone else I will do a countdown to Christmas. Each week I will post atleast one Christmas themed project on my blog. Each project will be easy and might give you some simple idea’s for Christmas gifts/projects.


So lets get the party started with Countdown to Christmas week 1. This project is as easy as it can get!. Wooden reindeer tree decorations. These could also be used as fancy gift tags. All you need is a wooden blank reindeer ( you could cut one out of card instead if you can’t get hold of any wooden ones!). I got mine off EBay. If you do a search for wooden shapes there are lots of sellers who sell them. You also need some paint ( I used white spray paint but acrylic or emulsion works just as well). Finally a gel pen and embellishments and your good to go!. Paint your reindeer and when its dry glue on any embellishments. I used buttons and red pom poms as noses. I used ribbon and craft wire for hanging and I used a gel pen to draw lines around the edge of the reindeer.

Thursday, 6 October 2011

Easy Christmas keepsake decoration

Today I thought I would share a cute Christmas Keepsake I have made for a craft fair I am doing next week. As with everything I do its easy peasy and doesn’t take long!.


I used a wooden bauble shape but if you don’t have any you could always cut a bauble shape out of stiff scrapbook card and that will work just as well. I sanded down the blank bauble then painted it pink. Once it had dried I used a gel pen to add the text and then I used a reindeer topper as an embellishment. I tied a cute ribbon round the top for hanging and that’s it – done!.

Wednesday, 14 September 2011

Busy weekend,a trip to Hospital and first of the christmas makes!

This weekend Me and Mr G went away for our wedding anniversary for 2 whole night. It was bliss. We stayed at the very posh Lowry hotel in Manchester which was gorgeous and my very thoughtful hubby had arranged for a bottle of Chablis (my fave wine) and a huge bouquet of flowers to be in the room. We did lots of shopping and then relaxed with a lovely meal in the hotel on the Friday. On Saturday we did some more shopping and then met up with friends for a Tesco wine fair at the GMex Centre. After 4 hours of tasting oodles of wine we toddled (or wobbled in my case) off to a lovely restaurant for a meal. A good time was had by all and to top it off Hubby’s favourite football team (Manchester United) were staying in our hotel and were leaving on a coach as we were going out on Saturday so he got to see them – I didn’t recognise any of them!!).

Whilst we were shopping on Saturday morning I got a blister on my foot (bare with me there is a reason I’m telling you this!) from not wearing socks. When we went out on Saturday I put a plaster on it and thought nothing more of it. On Sunday morning it was aching a bit but still not worth thinking about until….. by Sunday afternoon my whole foot , ankle and calf had completely puffed up. I went to bed on Sunday night to find that I couldn’t get out of bed on Monday morning!!. I ended up at A & E to find that after an x-ray I have a chip in my ankle that apparently isn’t a new injury and hasn’t been bothering me at all (no idea when I have done that!!!) but because my foot had become so swollen it was aggravating the chip!. The swelling apparently was from the blister which had become infected!. The doctor ordered me to have it completely rested and elevated for at least 48 hours with minimal pressure for a week -clearly he has no kids then!. I have to say Mr G has been amazing. He made me completely rest on Monday night making tea sorting Lili and even packing her school bag, pack lunch etc.

Anyway on to more interesting things like crafting. I haven’t been able to do much because of being away and then my ankle but I have managed to make a few Christmas Makes. I have been wanting to start for ages but resisted until September. There will be no stopping me now though!.


 I wanted to do a santa stop here sign last year and never got round to it. In the end i went and bought a cheap one from Poundworld - it was one that you stake in the ground it didn't last long!!  This one i have made will hang on Lili's bedroom and i have made an extra one to put in my Folksy shop


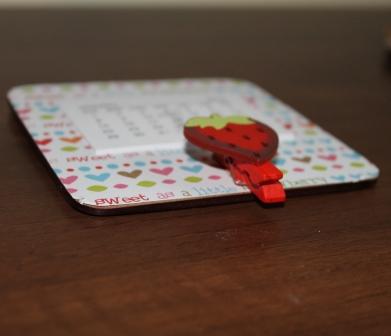
 This magnetic calendar note holder is made from a cheap coaster which i have covered with scrapbook paper and added a 2012 calendar and a cute little strawberry peg that i got from John Lewis.  It has a magnetic strip on the back for popping on the fridge. 


Thursday, 2 December 2010

Experimental makes!

This week i have been having doing a bit of messing about.  For some reason our study has been freezing (even with the heating on and lots of layers!) so i haven't spent much time in there so have only done a few tiny projects. Before i show you those however this is the wooden/fabric advent calendar i made for Lili.  It didn't take long to do.  I used a piece of MDF as the backing and then glued blue and green co-ordinating 12" x 12" card on.  then i cut out triangle's for the trees and rectangles for the stumps.  Decorated with papermania snowflake stickers and then cut out 24 pieces of different size rectangles out of felt.  I then stuck on felt numbers and used a hot glue gun to attach the wooden ho ho ho (which i bought from Home Bargains).


Now on to the experimental makes!I found some teeth  and lip sweet bags in tesco and thought i would do something funny with them.  Not sure why i have decided to give Santa False teeth but it does make me laugh!.
 I designed the header for these doggy treat bags using picnik.  i f anyone wants a copy drop me an e-mail to scratchy.cat@hotmail.co.uk.


 I made this little treat for Lili's teacher using the free printable from livinglocurto if you haven't visited this

website take a peek they have fantastic free printables 

 A few more stocking fillers that i great for girls!.  To make each set you will need one 12" x 12" scrapbook paper, one A6 notepad, 5 pencil crayons, embellishments and a cello bag.

Monday, 29 November 2010

This and that!

Today my little girl has been off school poorly.  So whilst she has been having a nap on the sofa i have made a couple of bits.  For a while i have been meaning to have a go at decorating a notepad and i have eventually got round to it!
At first it didnt seem to be going well but in the end it has turned out better than i thought!.  It is really easy to do just draw around your pad and score then cut out the card slightly bigger to give a border.  i snipped off the corners and used roller glue tape to stick.  once you have covered the notepad and stuck the edges on the inside of the pad take the first page and glue it on top of the inside cover to hide the border and do the same at the back. I used ribbon and stickers to embellish.  I have also put in coloured pencils in the pack and used co-ordinating card and ribbon to wrap around the pencils. I have put them in a self seal cello bag then made a bag topper from co-ordinating Papermania card and wrote on the label using a white gel pen.

 I used Kinder mini bars for this pack and wrapped in coloured paper then decorated.


 This pack is made using some fab blue ribbon i got from Costco yesterday.  I have wrapped the kinder bar in the ribbon and glued down then used toppers to decorate and then popped them in a cello bag and used some more of the ribbon as a topper.
 This cheeky monkey is Seb and i made him from a pair of socks.  i made him a while back but he was for a swap so didn't want to share earlier.

Thursday, 18 November 2010

A big Thankyou

A big thank you to everyone for all their lovely comments and feedback about my new shop.  It's really kind of you all to take the trouble to look at it for me.  I am working on all the feedback a got so thank you so much. 

Now back to the Christmas stocking fillers and here's a few more bits i have made...

 Chocolate Christmas tree hanging decorations.  Each circle has a n Elizabeth Shaw chocolate in the middle and ribbon for hanging from the tree.  I used a 2" scalloped punch for the outer circles and 1" circle punch for the inner.  The cute stickers are from accessorize.  the idea came from Helen over at its all fiddlefart

The jar of snowballs came from an idea over on The Moneysaving Expert Forum.


These chocolate snowmen are from Aldi.  they came wrapped in a shocking wrapper and look much nicer wrapped in cellophane with a ribbon tied round.

Tuesday, 16 November 2010

More milkshakes!!

Just a quick post to show you a few more fairy milkshakes i have made.  See my previous post for what goes inside.

  Ok go on then i'll also show you the chocolate gift sets i made!!

Stocking fillers Part 3

Todays stocking filler is one i have made with my little girl in mind - because its covered in Pink. Anyone with a little girl will know if its not pink then its just not girly!! The idea was taken from a thread on MSE where someone (sorry but i can't remember who but if anyone is reading this and thinks it was them just leave me a comment and i'll edit it) mentioned they made princess shakes. i have recently made loads of snowman soup and thought this would be a nice alternative for young girls.

Heres how i made it.  I designed a label and thought up (ok my fab hubby came up) a suitable poem to put on it.  i used picnik to design the label.  Then i cut it out and stuck it on a sheet of papermania xmas backing card.  I repeated these steps so that i had one for the front and one for the back.  then i put all my ingredients together in a self seal bag.  i also used individual smaller bags inside for each of the items to make sure they stay fresh.  Then i took the sealed bag of goodies and attached it to the wrong side of one of the sheets using roller double sided glue tape.  Then i took the other sheet and attached that on top of the bag of goodies so they were sandwiched between the two sheets.
The contents i used are shown in the pic above:-
  • pink milkshake powder i used nestle but there are lots around.
  • mini marshmallows
  • pink candy sweets
  • chocolate biscuit striring sticks
If anyone wants a copy of my lable then drop me an e-mail to scratchy.cat@hotmail.co.uk and i'll send it you.

Sunday, 14 November 2010

Stocking Fillers Part 2

Carrying on with the stocking filler theme i am going to post about a couple of things i made today.  Firstly these very cute christmas tree hanging sweet decorations ...
 The penguins are definately my favourite.  I got them from B&M Bargains and put them into a cello bag and then made a topper from papermania christmas card and used stickers from Accessorize for the middle.  I used a 2" scalloped punch for the outer circle and a 1" scalloped punch for the inner circle.  Finally i used a white gel pen to colour the whit dots around the edge of the 2" circle.

 This is a variation of the Friends mint gift i posted the other day.  i used a small glass jar and added mints to it.  Then i glued on some ribbon around the jar.  I punched a 2" scalloped circle for the top out of patterned card and punched a hole in the friends tag i had made (if you want a copy of this tag drop me an e-mail me at scratchy.cat@hotmail.co.uk )thread matching ribbon through the tag and glued it to the top of the jar.  then i glued the scalloped circle on top of it.  Finally i put the jar in a large cello bag (i put a piece of thick card in the bottom to widen out the bag) and tied with matching ribbon.


Back soon with some more stocking filler ideas.

Stocking fillers Part 1

                          
I have a few craft fairs coming up so have been making some bit for those and thought i would do a series of posts based around stocking fillers i am making.  Hopefully it will give you some good ideas and you can all give them a go.

So todays stocking filler is the  cheeky christmas cookie cutter gift:-


You will have to excuse the rubbish photo but i had to take it in the dark with the flash.  I got this idea from the very talented helen over at itsallfiddlefart after seeing something she had posted over on the MSE forum.  It is so easy to make.  I designed the label and then printed off onto card.  i have done two types of labels one with the gingerbread man  and hearts around the border and one plain which i have then embellished with stickers.  Punch a hole in the tag and use ribbon to attach to a pastry cutter of whatever shape you like.  i got these ones in home bargains and i think they were in a pack of 6 for £1.  Pop your cutter and tag into a self seal bag and seal up.  Easy peasy lemon squeezy!.  If anyone wants a copy of the lables i designed just drop me an e-mail at scratchy.cat@hotmail.co.uk


Friday, 12 November 2010

Crafting for Christmas officially starts now!

                                    
Ok now that Lili's birthday is out of the way i can start focusing on Christmas.  There is only 44 days till Christmas day and i have a lot of presents to do.  Now not everyone appreciates homemade gifts but personally i do.  I think it shows someone has made a real effort.  I think that people associate homemade with cheap and that certainly isn't the case most of the time.  With all the cheap shops around it is definitely cheaper to pick up bits from those than make things from scratch.  I have decided that as well as buying presents for family and friends this year i am determined to include in each present at least one item that has been handmade. Bearing this in mind i'd better get some serious crafting done!!.  I'll show you the bits i have done today so far.
Friends testube of mints.  These are dead easy to make if you want to make some.  Just buy some plastic test tubes (i got mine of ebay) and fill with tic tacs then tie some ribbon round with a tag on.  its upto you if you want to put them in a clear sealable bag but i have.  i designed the tag myself on picnik and if anyone wants a copy of it just drop me an e-mail to scratchy.cat@hotmail.co.uk and i send you my jpeg file.


Next i decided to make some animal treat bags.  I haven't got a dog but i will give these to my friend who has a dog grooming business and 2 dogs!.  I might make some for the craft fairs i have coming up to!!.  Again i designed the topper on picnik.com then stuck it onto a piece of backing card.  The text was red but i didn't like ti when it printed so i have gone over it with a black gel pen.
I picked up some red giftbags in tesco which are 20p each but on offer at 3 for 2 and thought i would have a play around.  For some reason i keep chuckling when i look at my finished santa bag.


This next gift bag i have made using some organza.  i have sewed it as a drawstring bag then threaded ribbon through and sewed on the label (which i printed onto the fabric using transfer paper).  then i have put patterned tissue paper inside.
Lastly (slightly cheating as i made this a bit back but only got round to adding the motifs today!) i have made this bag for my niece .