Thursday 24 February 2011

sock chicken

Remember i while ago i said i had a few sock creatures on the go well i finally finished the sock chicken.  I made him by kind of following the sock monkey instructions and then amended parts to suit.

Isn't he cute?  if you fancy making one just send me an email and i'll send you the instructions.
monogram
Iron Violet Designs


Tip Junkie handmade projects

Wednesday 23 February 2011

decorating stationery

Morning everyone.  Its half term this week so i haven't had much time to craft as i have been spending some mummy daughter time with Lili.  She does love crafting though so while she was drawing some pictures for me i decided to do a few quick projects.  i have quite a few birthdays coming up so thought i would make some fancy gift bags and i have also been meaning to try decorating plain notebooks again.  Heres how they turned out..

 I used plain brown sandwich bags and scrapbook papers,ribbon, stickers and little embellishments


 I used my new cricut expression to cut out the letters

 I just love these doodlebug papers and accessories i used


 I also decided to make a fabric cover for this one then cut out the embellishments with my cricut and used mod podge overthe top to make them durable.
These projetcs are really simple and fast so give it a go and let me know how you go on!

Friday 18 February 2011

Cute little note holder

A while back i bought some wooden plaques made from MDF to make some bedroom signs for my neices. I still have a couple lying around so i came up with a cute little note holder for in Lili's bedroom.  What do you think?...
 It was easy to do i just took me about half an hour
 The cute bird stickers are from accessorize

If you want to make one you will need..
  • a wooden plaque (or you could use really stiff card)
  • 3 wooden pegs
  • spray paint
  • a piece of scrapbook paper and a small piece of co-ordinating card
  • stickers
  • ribbon
  • a 2" punch
  • double sided tape
  1. spray paint your pegs and leave to dry
  2. Cover one side of your plaque with scrapbook paper
  3. Punch 3 circles out of your co-ordinating card
  4. cover your pegs on the 2 straight sides with ribbon using double sided tape.
  5. attach one punched circle to the front of each peg and add a sticker.
  6. attach the peg to the bottom of the board using glue or dounble sided tape
  7. repeat woth the other 2 pegs
  8. stick a piece of ribbon near the top of the board and add some stickers
  9. stick a hanging piece of ribbon in a hoop shape to the back and then cover the back of the board with scrapbook paper to hide the ribbon.


Iron Violet Designs
monogram

Thursday 17 February 2011

Today I have quite a few people to thank and this is going to be a long post. This week I have been so lucky and have had my projects featured on some amazing blogs. I can’t tell you how lucky I feel as there are so many amazingly talented people in blogworld so it is the biggest ever compliment that someone actually wants to feature one of my makes (little old me :-) can you believe it! I can’t!!). Firstly I was featured on krista's blog while he was napping.  If you haven’t visited Krista’s blog before hop right over she is really talented and has some fab idea;’s. Thanks Krista.
Next I need to thankThe lovely Jill over on womenwhodoitall. She recently featured my sock cats on her blog. Again I can’t believe it I’m so chuffed and want to say a really big thank you. Go over to her blog and have a look round. It will give you so many idea's to add to your to do list :-) .


Mandy over on sugarbee also featured my cute sock cat project recently. Thank you so much. You really have to go and visit her blog she is so talented and I love getting inspiration from her blog. Check out her fab apron she has just made.


Thanks so much ladies I really am pleased as punch and have added your buttons to my side bar.


I also need to thank the lovely Suz over at inspiring creativeness for nominating me for a vesatile blogger award.  Thanks so much hun i am really touched.  i will do a seperate post on that one but in the meantime pop over to her blog and check it out.
And finally last but least I need to thank Shirl from Vintageseamuse who was my swap partner for the bloggy love swap. Look at all these fab things she sent me..


 Aren't they just great.  I love them all but this ceramic heart is def my favourite
 How cool is the bag she has made me. Purple is my favourite colour too
 This fabric is right up my street and i have already earmarked my next project to use it on...


Thanks so much Shirl.


Well all that thanking i feel like i am at the Oscars doing a speech!!!But seriously when i started my blog 9 months ago i never knew what a lovely community blogworld is.  This post reinforces what lovely lovely people you all are and i'm so pleased i discovered you all.

Tuesday 15 February 2011

How to dress up chocolate and bottle gifts

This weekend it was my father in laws birthday.  We got him a few bits and bobs and then as stocking fillers i bought a bottle of red wine he likes and a big bar of chocolate off Lili.  I decided to jazz up the wine and chocolate by using scrapbook paper,ribbon and a wooden heart. This is how it came out....

 I added scrapbook paper,ribbon,stickers and card onto a sandwich bag and worte on Happy Birthday with a gel pen.
 I painted a wooden heart white and then wrote Grandad and added a sticker to make the tag and i wrapped the chocolate in co-ordinating scrapbook paper to match the bag.
 I used another sandwich bag and co-ordinating paper to wrap the wine and then tied a matching ribbon around to keep the bag in place.
One boring gift made special :-)
Today's Creative Blog
Show and Tell Green

Simple bookmark and a big Thankyou

First of all i need to say a really big thankyou to Shirl over on vintageseamuse for the gorgeous bloggy love swap parcel she sent me.  I adore all the items and when i get a minute i will take some pics and do a proper post on it but while you are waiting for that why don't you pop over to Shirl's blog and say hello.  She is very talented and i am so lucky to have been paired with her for the swap.


Now secondly i wanted to share a really simple project with you.  Me and Mr G love reading and for one of his valentines pressies i wanted to make him a bookmark.  I have made wooden bookmarks before but these all look a bit girly so i thought i would make a card one instead.  I started with a card luggage tag (i bought a pack of 10 for £1.20 in Tesco's)
 Then i used double sided tape to stick one side of the luggage tag all over (once i had removed the string) then i placed the luggage tag onto the reverse of a piece of patterned background card and then cut around the edge.  I then did the same on the back of the tag.  Then i punched a hole in the top and fed some ribbon through.  I then used stickers to apply the text.  This is the front....
 and this is the back....

This is such a simple project and turns out better than i thought it would.  I'm now going to make some more the rest of my family.

topsy turvy tuesdays

handmade projects


Today's Creative Blog
Show and Tell Green

Friday 11 February 2011

Valentines idea's

Whilst there is no one else in the house (rare moment!) i have finished off MR G's Valentine's pressies and gift bag.


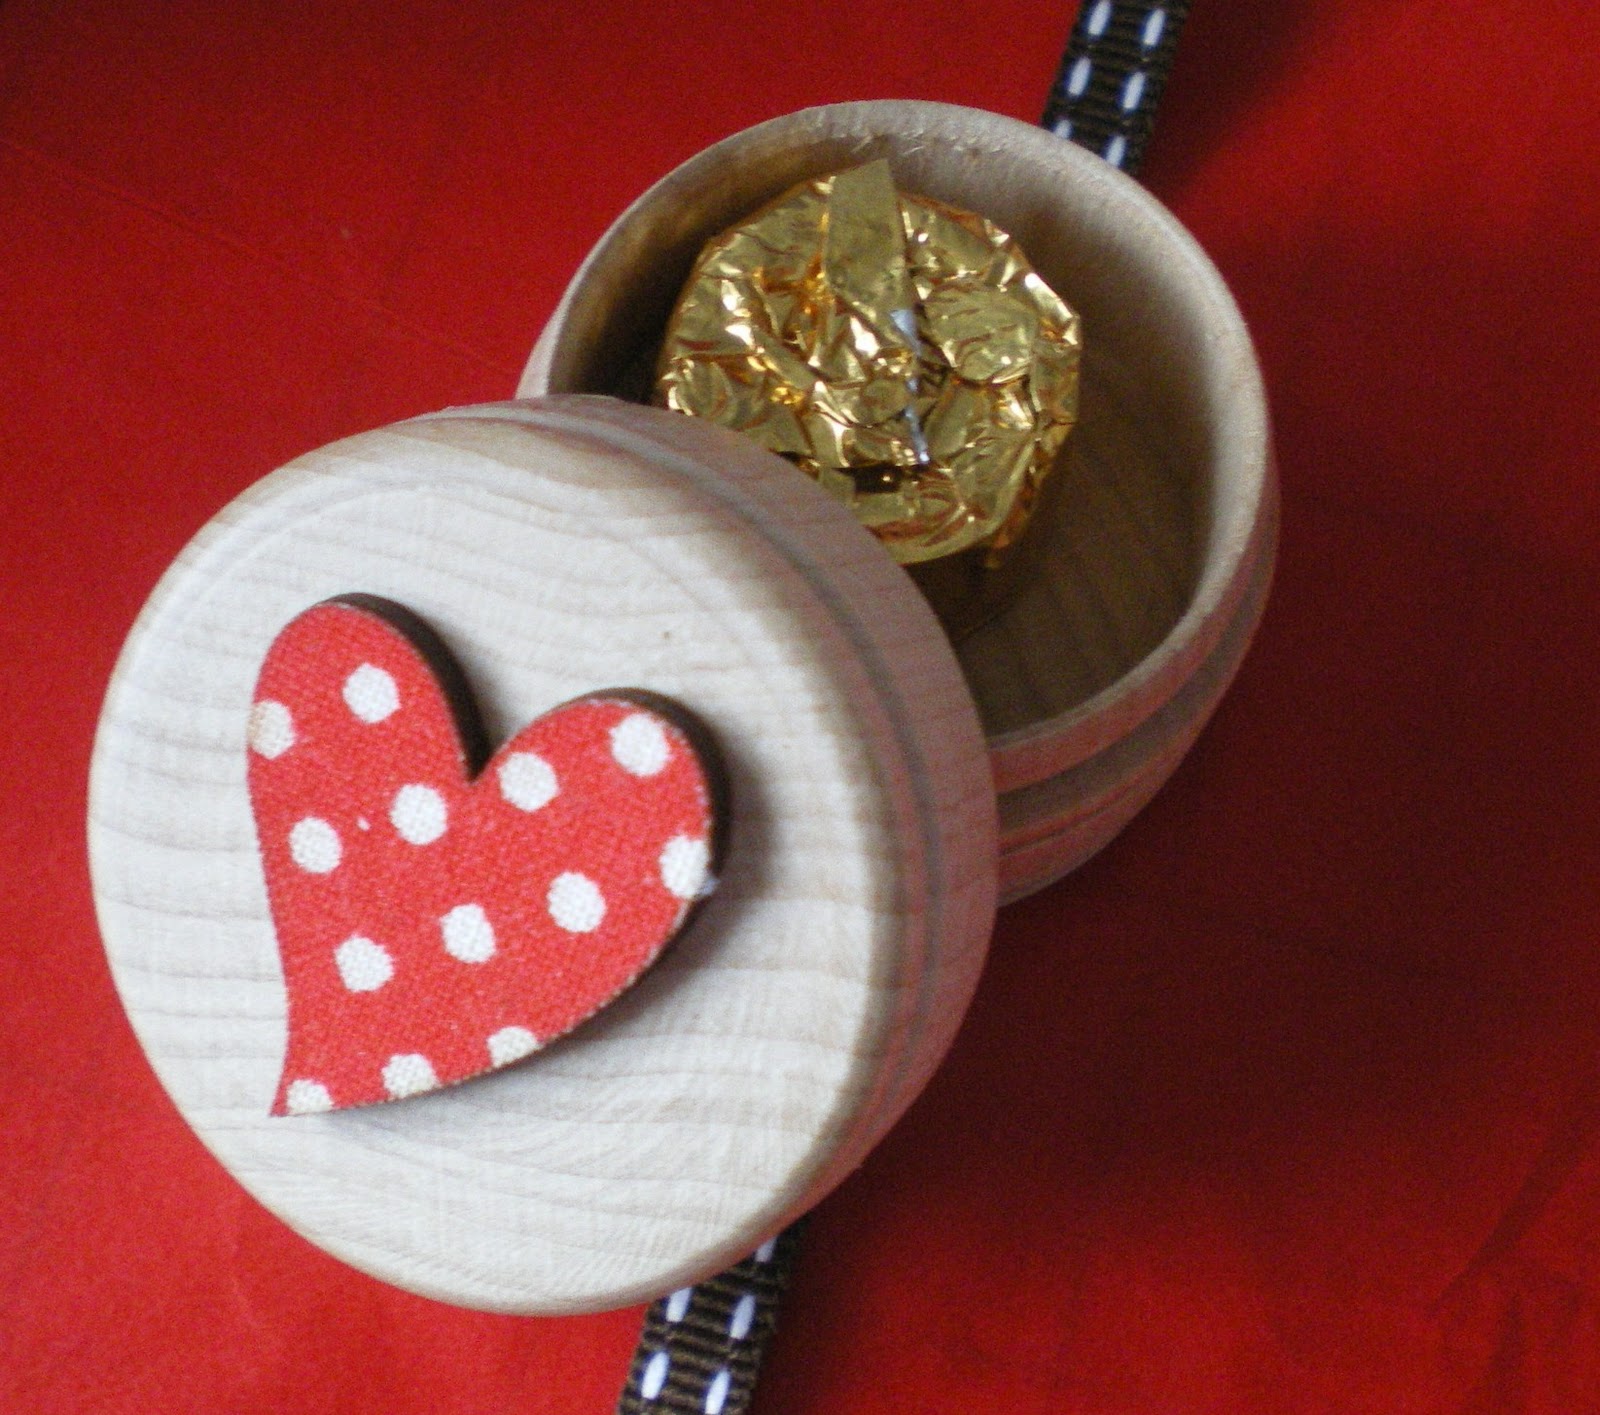
Take a peek at what i have made him.  First of all this cute idea that came to me earlier.  I bought this wooden box to make into a box to keep a first lock of hair in but the lid doesn't grip on so it isn't suitable.  I bought a packet of rolo's and was going to stick the last one on a piece of card but thought this was a miles better way of giving it...


 I stuck a wooden heart (from John Lewis) on top of the box just to finish it off.

 This next pressie i love.  Mr G isn't a big photo guy and doesn't have much decoration on his desk at work but i thought this was romantic but not too soppy at the same time.  I printed the words straight onto fabric by running the fabric straight through my printer.  I just cut an A4 piece of fabric and stuck it to a piece of A4 paper then printed as usual.
 I thought it would be nice to vamp up a boring brown sandwich bag.  I'm not one for boring wrapping paper and love how this has turned out.
 How cute is the envelope sticker i used in the centre.  The background paper i used is Papermania from their Christmas range.
Here it is with all his pressies in.  The bag also contains Jeremy and these.  Now i just need to make his card!! 


Catch a Glimpse Button


topsy turvy tuesdays